SSL with Let’s Encrypt on AWS Cloud Front
Go SSL with AWS Cloud Front using a Let’s Encrypt certificate. You can start publishing SSL-enabled web pages for free with unbeatable pay-as-you-go pricing. Cloud Front charges based on the number of hits, and if you can get an SSL certificate for free, you can get started for free. Learn how to provide an explosive and secure site with Cloud Front.
M1 Get a Let’s Encrypt certificate on your Mac
Get a free certificate at Let’s Encrypt.
M1 We will show you how to obtain a certificate on a Mac environment, assuming that you are able to publish your webbase on S3. The following article will show you how to do this.
Install certbot.
brew install certbotAfter installation, it is installed in [/opt/homebrew/Cellar/certbot/2.1.0/bin/certbot].
In my environment, the link was not put in bin. I tried to use it as it is without linking.
/opt/homebrew/Cellar/certbot/2.1.0/bin/certbot --version
certbot 2.1.0
command seems to work. Let’s create the certificate as is without the symbolic link.
If you want to issue a certificate for learning-english.algo-ai.work, the command will look like this
/opt/homebrew/Cellar/certbot/2.1.0/bin/certbot certonly --manual -d learning-english.algo-ai.workWhen you type, the message “Create a file containing just this data" is displayed, so create a file in S3 for authentication, place it there, and authenticate it.
- - - - - - - - - - - - - - - - - - - - - - - - - - - - - - - - - - - - - - - -
Create a file containing just this data:

xxxxxxxxxxxxxxxxxxxxxxxxxxxxxxxxxxxxxxxxxxxxxxxxxxxxxxxxxxxxxxxxxxxxxxxxxxxx

And make it available on your web server at this URL:

http://learning-english.com/.well-known/acme-challenge/xxxxxxxxxxxxxxxxxxxxxxxxxxxx

- - - - - - - - - - - - - - - - - - - - - - - - - - - - - - - - - - - - - - - -
Press Enter to Continue
Upload the entire .well-known to S3 and press [Enter] to approve and issue the certificate.
The set of certificates will be located in “/etc/letsencrypt/live/learning-english.algo-ai.work/".
Send a set of certificates to Cloud Front
Send a set of certificates to Cloud Front via AWS command.
Create IAM user
First, create a policy to grant privileges to the IAM user: create the following in the JSON tab, return to the visual editor, continue to the next step and press the “Create Policy" button. If you do not see the button on the screen, you can see it by reducing the text on the web screen.
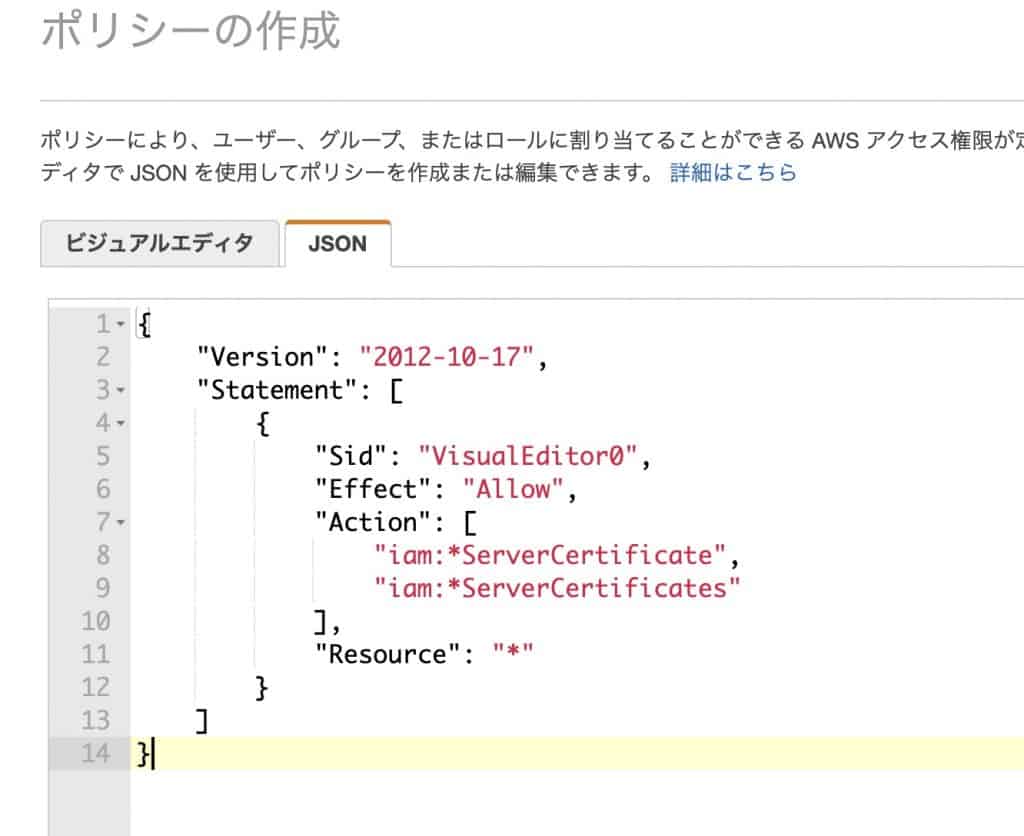
{
    "Version": "2012-10-17",
    "Statement": [
        {
            "Sid": "VisualEditor0",
            "Effect": "Allow",
            "Action": [
                "iam:*ServerCertificate",
                "iam:*ServerCertificates"
            ],
            "Resource": "*"
        }
    ]
}
After creating the policy, open IAM and create a user.
Add a user.

Create a user with certificate privileges in the policy you created.

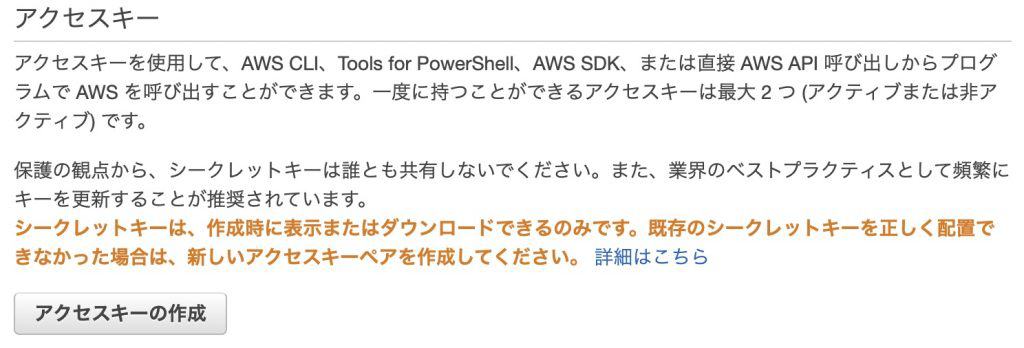
Select the user you created and choose the Authentication Information tab.

In the “Access Key" field, you will create an access key.
You will get an access key and secret access, which you should write down and use later in aws console.
Send certificate to Cloud Front with aws cli
Install the awscli command on m1 mac.
brew install awscliType “aws configure" and you will be asked for the Access Key ID and Secret Access Key.
aws configure
AWS Access Key ID [****************]:
AWS Secret Access Key [****************]:
Default region name [ap-northeast-1]:
Default output format [json]:
Upload the certificate using the aws command. Change the directory name to your domain name and execute.
aws iam upload-server-certificate --server-certificate-name learning-english.algo-ai.work-ssl
--certificate-body file:///etc/letsencrypt/live/test.algo-ai.work/cert.pem
--private-key file:///etc/letsencrypt/live/test.algo-ai.work/privkey.pem
--certificate-chain file:///etc/letsencrypt/live/test.algo-ai.work/chain.pem
--path /cloudfront/
Set up certificates in Cloud Front
Set the created certificate to Cloud Front.
Create a distribution and select the origin domain where the published web server information is located.
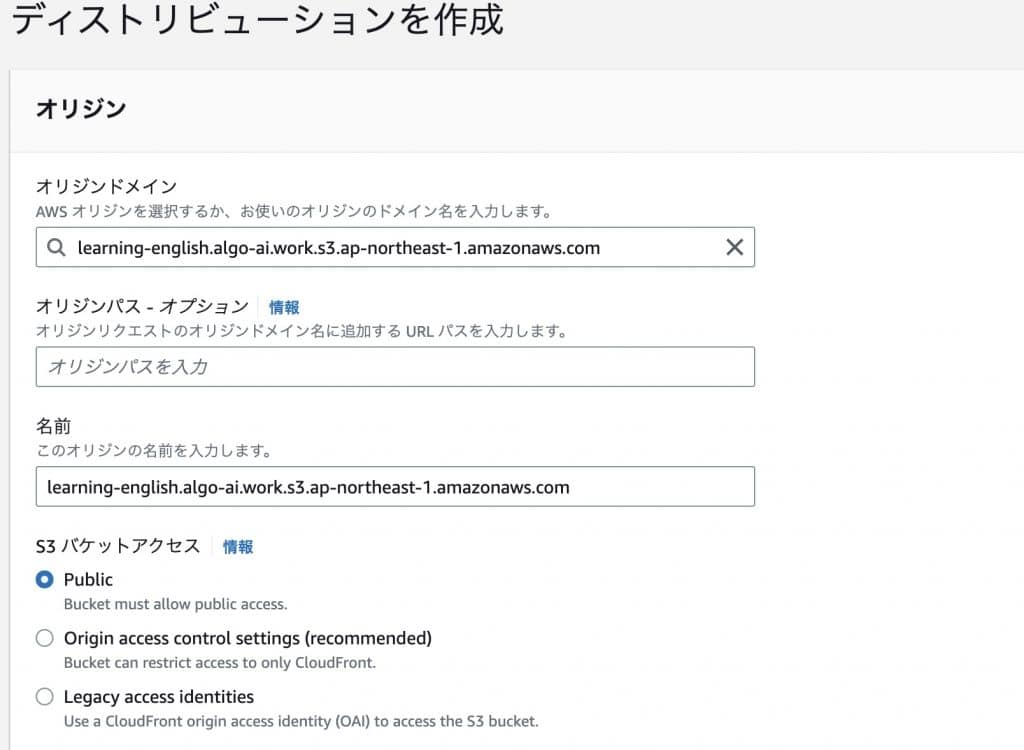
Set an alternate domain name (CNAME) to use your own domain.
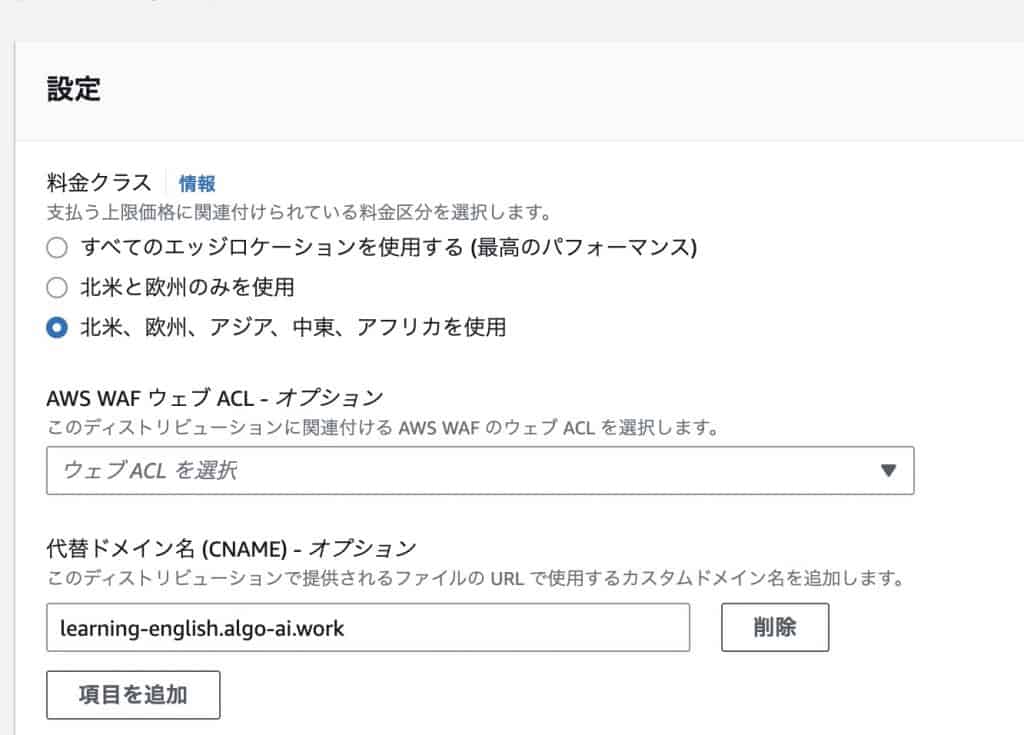
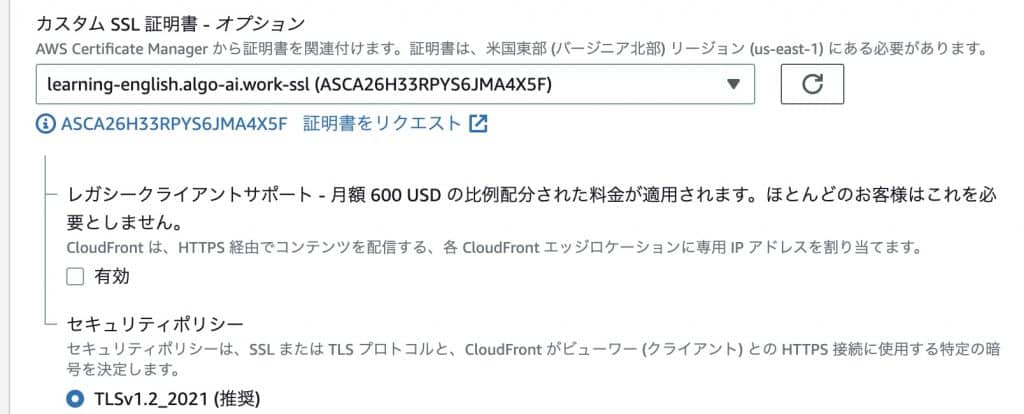
Select the SSL certificate. If you have the certificate you just uploaded, you have succeeded.
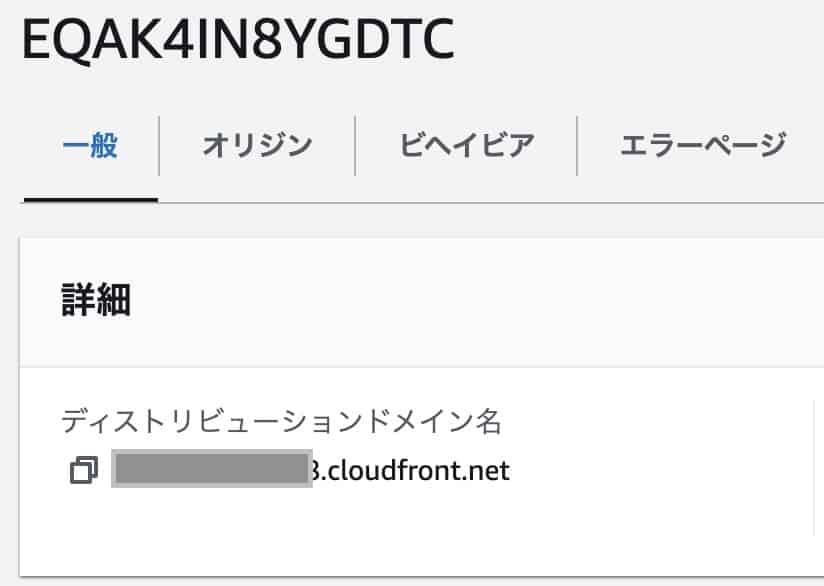
Cloud Front should be able to publish the web server. If you can wait a few minutes, copy the distribution domain name and access it with the URL in another tab of your browser, you have succeeded.
Connect your own domain to CloudFront with Name.com
Set up a cname at Name.com so that you can access the S3 URL from your own domain.
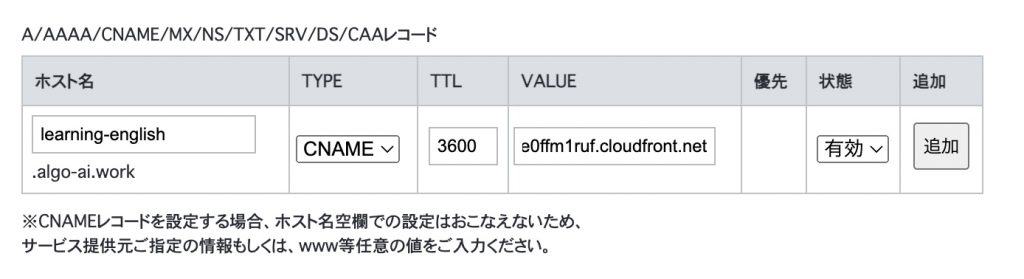
Configure CNAME settings in DNS.
CNAME records are a mechanism that allows you to associate an alias with a canonical name, so that you can access AWS with your FQDN, and then associate it with your canonical name to access your own domain.
Go to Name.com and from the Domains tab, click on “Domain DNS Settings".
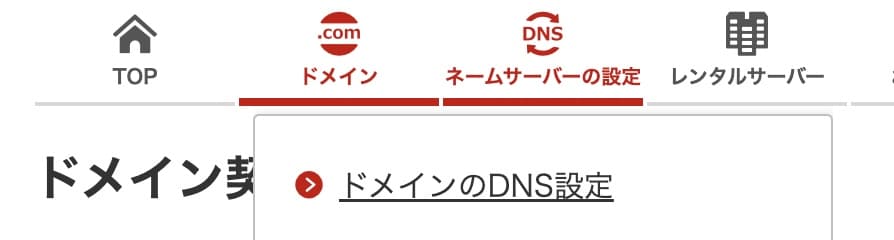
Click the “Configure" button under Use DNS record settings.

Add a record, selecting “CNAME" for TYPE, with any subdomain name for the hostname and the AWS CloudFront URL for the VALUE. Click the ADD button to confirm and configure.
Conclusion
We have shown you how to use Let’s Encrypt certificates to SSL-ize your website on AWS Cloud Front. Now you can build a CDN environment with enhanced security, and create a blazing-fast website.
Follow me on Twitter if you don’t mind